The error Err_Proxy_Connection_Failed is a Chrome issue commonly encountered on Windows PC. The issue can be very frustrating as it does not allow you to access the web pages that you wish. What does the error mean? The error simply means that the proxy server is refusing connections. There are many reasons you might face the issue, which includes both Windows as well as browser issues.
A common reason why you enactor such ash issue is due to malware or virus on the device. At times when a malware settles on the device, it changes the browser settings as well as many other configurations on the device. Solving the issues is not very difficult, however, it is best to get rid of it soon as possible in order to avoid further damage to the PC. The error can occur on any browser be it Google Chrome, Mozilla Firefox or Internet Explorer.
Read also: Err Tunnel Connection Failed.
Solutions for the error Err_Proxy_Connection_Failed
You can resolve the error in many ways depending on what has caused the error on the PC. See below various solutions for this dreadful glitch.
Solution 1 – Delete Proxy Key on Windows
- Press Windows key + R to open the Run Command.
- Type in “regedit” to open the registry editor.
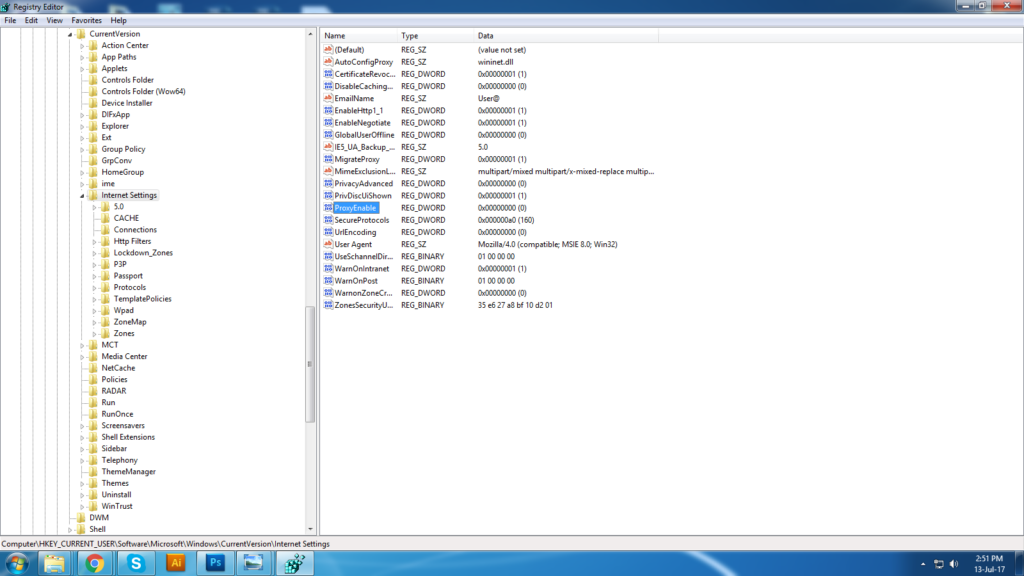
- Now follow the following path – HKEY_CURRENT_USER\Software\Microsoft\Windows\CurrentVersion\InternetSettings.
- Now look for “ProxyEnable Key” in the right panel and delete it.
- Next, select “ProxyServer registry key” and delete it as well.
- Once done close the tab and restart your computer.
In most cases deleting the proxy solves the issue. If not then find other solutions to get rid of this frustrating glitch.
Solution 2 – Check browser proxy setting
At times due to malware or some virus, the browser settings change as infects your system. Thus causing errors such as the Err_Proxy_Connection_Failed. Once the antivirus has removed the virus, check the browser proxy settings. Below are steps for it.
- Open Google Chrome and click on “Customize and control Google Chrome(These horizontal lines icon)”.
- Next click Setting.
- Scroll to the bottom of the page and click on “Show Advanced Settings”.
- Now click on “Change Proxy Settings” under Network.
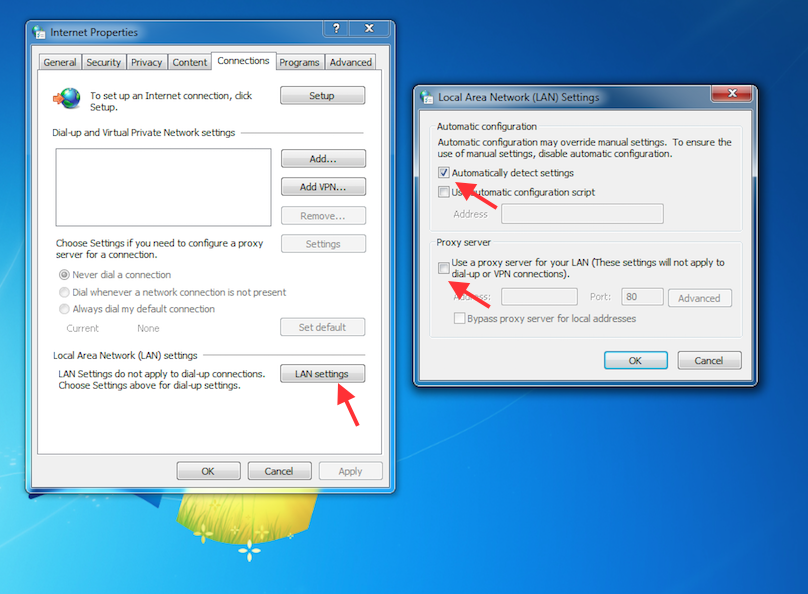
- A new window will open which is known as Internet Properties.
- Now go to the Connections tab and then press the LAN settings button.
- A new window will open which is known as the Local Area Network Setting.
- Now, under Proxy server settings, Unmark this option “Use a proxy server for your LAN(These settings will not apply to dial-up or VPN connections)”.
- Now under Automatic Configuration, check mark the box for the following option “Automatically detect settings.”
Now click OK to proceed. - Close all windows and disconnect and then reconnect your internet.
Once you are done with the above steps check if the error is disappeared. This is one of the best solutions for the issue.
Solution 3 – Reset TCP/IP and Flush DNS
- Firstly go to Start Menu and search for CMD.
- Click to open it and then type the following commands. Also, press enters after every command.
ipconfig /flushdns
nbstat -r
nbstat – rr
netsh int ip reset
netsh Winsock reset
Once done close the window and restart your computer. This will flush the DNS and reset the TCP/IP of the device.
Solution 4 – Reset Browser Settings
If in any case the above solutions don’t work then reset the browser settings which will remove all glitches from the browser.
- Open Google Chrome.
- Click on Settings from top right corner of the window (available when clicked on the horizontal line icon).
- Scroll down and press “Show Advanced Settings” option.
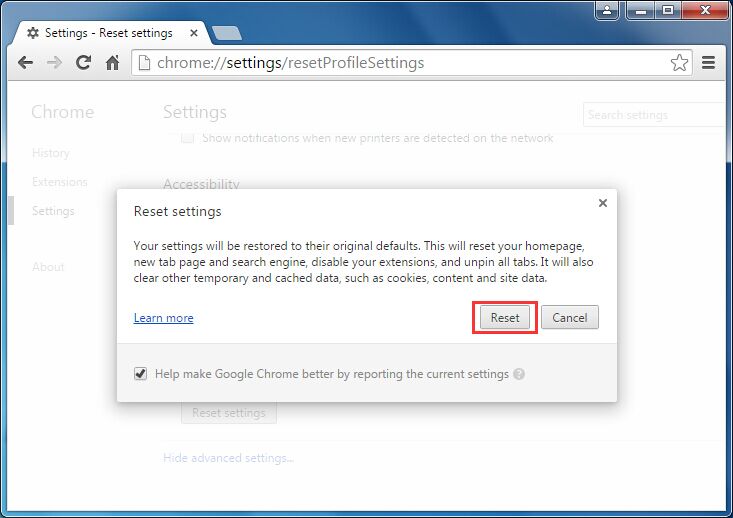
- At the bottom of the page, you will see Reset settings options, click on it.
- A pop-up will open, select Reset to continue.
Once done restart your browser to see if the troublesome issue is disappeared.
Solution 5 – Run a full malware scan
- Open Start menu and search the following in the search box “Microsoft Security Essentials”.
- Now check the box where it says “Full” to run a full scan of your computer.
- Next, click on “Scan Now” option.
- Once the scanning is completely close the tab.
Voila! you are all done with it.
Solution 6 – Run Windows in Safe Mode
At times running windows in safe mode can solve the issue and all glitches that are occurring on the system. See below steps to run it in Safe Mode.
- Open Start Menu and click on the drop down menu and select Restart.
- Remove the battery and insert it again in few seconds.
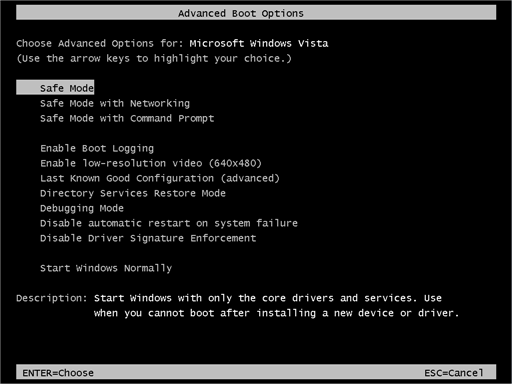
- Then, restart your computer.
- Select Safe Mode while the PC is rebooting.
- Let it reset it.
You are all done! Now check if the issue still shows on your browser or not. The good thing about this solution is it will remove other glitches in the system.
Solution 7 – Router Troubleshoot
The problem may also occur on Computers that use Wi-Fi. If your router is active and running continuously for a long time it can chunk the network proxy. An easy solution to it is unplugging router power cable for few minutes and then plug it again to start it. This easy solution has proved to work for many users especially on Windows computer.
The above solutions in most cases will solve the error Err_Proxy_Connection_Failed. However, if nothing works then try uninstalling the browser and then reinstalling it. The error is mainly related to the proxy issues, therefore, deleting the proxy key or checking browser proxy settings does solve the frustrating glitch.