The Error Code 0x80070422 is an issue associated with the Windows Firewall. Although, the issue is very easy to resolve but should not take it lightly. The good part of the problem is that the solution can be quick so one can get back to using a computer in no time.
Majority of them receive the problem while the PC starts. This mainly happens when there is a third-party firewall on Windows 7,8, 8.1 or 10. Also, the issue can occur while downloading an app from the Windows store. Another time the fault can appear at the time of updating the incorporated antivirus on the Windows 10.
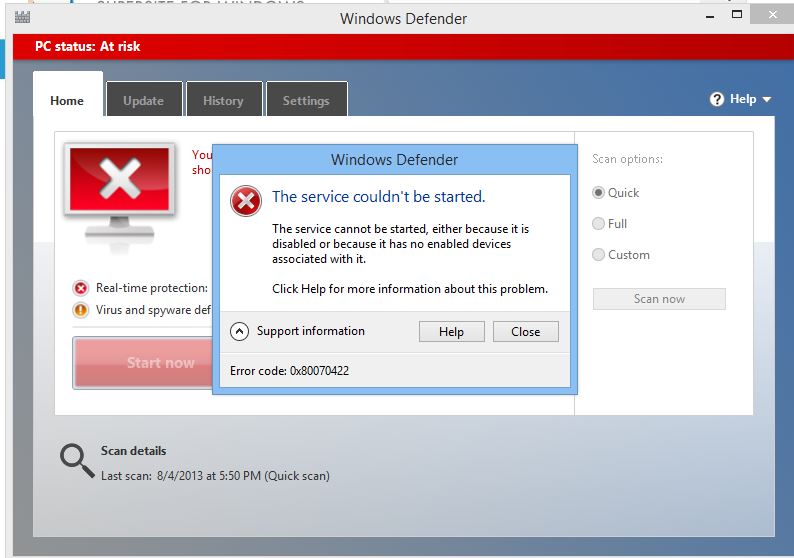
Furthermore, a message appears with the error code when the issue arises. Generally, the message reads “Windows Firewall can’t change some of your settings. Error Code 0x80070422 OR Windows Defender: The service couldn’t be started. Error Code: 0x80070422.”
Windows firewall plays an important role while browsing the internet. The chief function of it is to protect the computer from being a victim of a malicious attack. If the Windows firewall is off, then the computer is open for attack. Thus, the user will face more issues as this malicious spyware and malware can harm the computer in a big way.
Therefore, it is important to keep the firewall ON always. Some also face the issue when certain service by Windows is unable to launch it. However, there is no need to panic as these are a very easy error to fix.
Solutions for the Error Code 0x80070422
There are many solutions that one can try. The reason why the solutions differ as there are several reasons that cause the problem. The below are solutions for each cause that can help resolve the issue.
Solution 1 – Enable Firewall using Services Option
Majority of times the issue the error arises as the firewall fails to start while the OS has commenced. It is not possible to manually turn on the firewall. Hence, this has to be done via the services option. Here are steps to do enable the firewall.
- Firstly, press WIndow + R to open the Run application.
- In the field box, type the following “services.msc” and press enter.
- Now, look for Windows Firewall and check its startup as well as status.
- If it is disabled, then enable the service so it automatically starts while operating systems boots up.
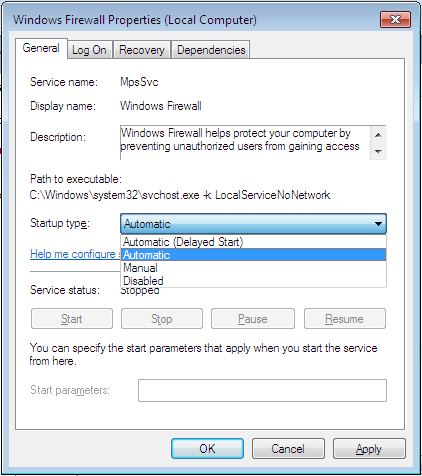
- To change the startup, double-click on windows firewall service.
- Select “General” from the available options.
- In the tab, an option will be available by the label “startup type”.
- Change the setting to automatic from the disabled option.
- Now, click on the button “apply” to make the changes and then press OK.
- Now, right-click on windows firewall on the services window and select the option “start”.
The above steps will initialize windows firewall that in return will resolve the troubling error.
Solution 2 – Uninstall third-party antivirus
If the issues are arising while updating windows defender then it is best to manually download it. Usually, the issues appear on Windows 8 and 10 version of operating system. Go to the official Microsoft website and download the Windows defender from there. Also, check if the operating system is 32-bit or 64-bit operating system. This is to make sure that the right version is downloaded.
Install it once the update is downloaded. Usually, this should the frustrating error. However, if the issue arises while initializing windows defender, then the problem is due to the third-party antivirus on the system.
The issue is that windows defender disables itself as soon as a third-party software is installed. Therefore, to avoid the error it is best to not open Windows defender while another antivirus is installed on the system. The other option is to uninstall the third-party software to get rid of the fault.
Solution 3 – Disable IPv6
Many users have found this solution very helpful in getting rid of the glitch. It is very easy to disable IPv6. Below are steps to do so.
- Click on Start, then open Control Panel.
- Open “Network and Sharing Center” from the available options in the control panel window.
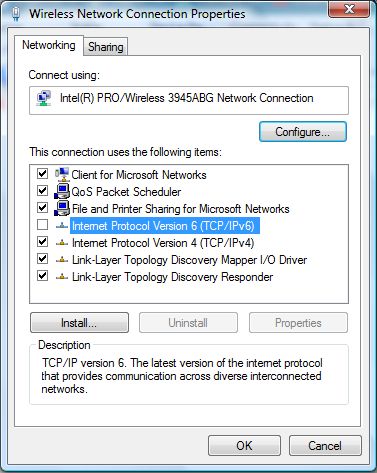
- Select the connection that the PC is using, right click on it to select “Properties”.
- Look for Internet Protocol Version 6 (TCP/IPv6) from the list of items.
- Once found, uncheck the box that appears before the option.
- To save the changes made click on “OK”.
- Finally, restart the computer to see if the problem is solved.
Read about also: The “Thread Stuck in Device Driver” .
Solution 4 – Permitting Background Intelligence Transfer
In case the issue emerges while updating windows or while downloading an app from the app store then changing the background intelligence service can solve the error.
- Firstly, open the Run Application by pressing Windows + R key.
- Then, type the following run command “services.msc” and hit Enter.
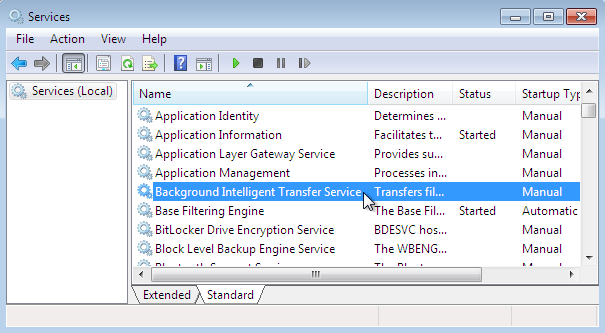
- Look for Background Intelligence Transfer Service and double-click on it.
- Now go to the “General” tab and in the startup type select “Manual”.
- Next, from the server status window, click on the Start button.
- This change will Enable and commence the Background intelligent transfer service.
- Click “OK” to permit the changes.
Solution 5 – Use CCleaner and Malwarebytes
CCleaner is a third party software that will scan and remove all malware from the PC. At times, viruses on the system can cause such an error. Here are steps to do so.
- Firstly, download CCleaner and Malwarebytes.
- Then install both the programs on the computer. Follow on-screen instructions for installation.
- Next, run Malwarebytes to scan the computer for corrupt files on the PC.
- If any malware exists on the system then it shall remove them.
- Now open the CCleaner and under the Windows tab click on the following section “Cleaner”. Then, select all checkboxes under Internet, Multimedia, Utilities, and Windows.
- Once all boxes are checked, click on Run Cleaner button. Wait till the program runs its course.
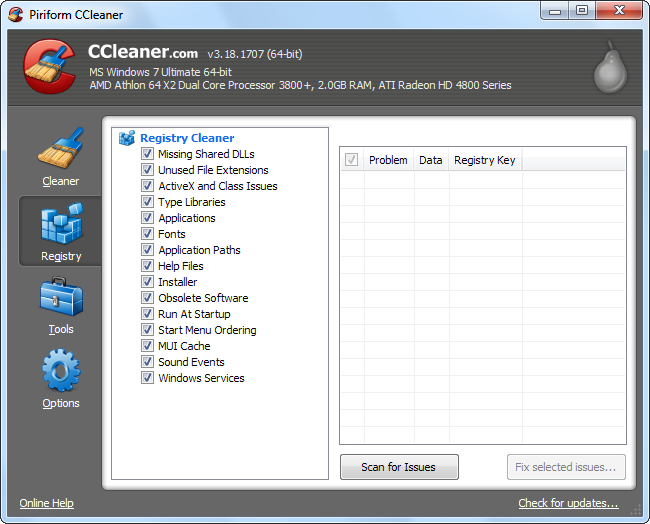
- Additionally, go to Registry tab and select all checkboxes under Registry Cleaner.
- Click on “Scan” and once it scans, click on the option “Fix Selected Issues”.
- Next, click “Yes” on the pop up that appears with a question “Do you want backup changes to the registry?”
- After the backup, select “Fix All Selected Issues”.
- Restart the computer to save all changes.
Once done, check if the frustrating glitch is still glued to the system or is resolved. Generally, this will resolve this troublesome problem.
The Error Code 0x80070422 is an easy issue to solve. The great part about it is, that it specifies what causes the problem. In most cases, these solutions will come handy when you receive the irritating error.